![You are currently viewing How To Make A WordPress Blog: A Step-by-Step Guide [2023]](https://rightroutemedia.com/wp-content/uploads/2023/07/make-wordpress-blog.jpg)
Discover the art of making a WordPress blog – your portal to a dynamic online space for self-expression, knowledge-sharing, and camaraderie. Ready to unleash your creativity and connect with like minds? This guide navigates you through designing, content, and promotion, empowering you to create an impactful blog.
Understanding How to Make a WordPress Blog
WordPress is a powerful and versatile content management system (CMS) that empowers millions of websites and blogs worldwide. It is the go-to platform for individuals, businesses, and organizations seeking an efficient and user-friendly way to create and manage their online presence. In this section, we will delve into the key aspects of WordPress, its features, and the differences between WordPress.com and WordPress.org.
What is WordPress?
WordPress is the most popular and open-source software that allows users to build and manage websites without the need for extensive coding knowledge. Originally launched as a blogging platform in 2003, it has evolved into a full-fledged content management system (CMS) that supports a wide range of websites, from blogs to business sites, e-commerce stores, and community forums.
One of the primary reasons for WordPress’s popularity is its ease of use. The intuitive interface the availability of pre-designed themes and the amount of WordPress plugins available make it accessible to beginners and experienced developers alike to create a great blog.
Key Features and Advantages
- Customizability: WordPress offers a vast collection of themes and templates that can be customized to suit your unique style and branding. Whether you’re a blogger, a photographer, or a business owner, there’s a theme that fits your needs.
- Plugins for Enhanced Functionality: With the extensive plugin library, you can add various features and functionalities to your WordPress site without writing a single line of code. From contact forms and social media integration to SEO optimization and security enhancements, there’s a plugin for almost anything you can think of.
- SEO-Friendly: WordPress is designed with search engine optimization (SEO) in mind, which means it facilitates better search engine rankings. By using SEO plugins and following best practices, you can optimize your content and increase the chances of attracting more organic traffic.
- Mobile Responsiveness: Most modern WordPress themes are mobile-friendly, ensuring that your website looks great and functions smoothly on different devices, including smartphones and tablets.
- Active Community and Support: As an open-source project, benefits from a massive and active community of developers, designers, and users. This community continuously contributes to its improvement and provides extensive support through forums, documentation, and tutorials.
Differences Between WordPress.com and WordPress.org
It’s essential to understand the distinction between WordPress.com and WordPress.org, as they offer different hosting solutions and levels of control.
WordPress.com: This is a hosted platform where you can create a website without the need for separate hosting. It is suitable for beginners or those who don’t want to deal with technical aspects like server management and updates. However, it has limitations in terms of customizability and access to plugins unless you opt for a premium plan.
WordPress.org: With WordPress.org, you download the WordPress software and host it on your chosen web hosting provider. This self-hosted WordPress version grants you complete control over your site, allowing you to install any theme or plugin you desire. It’s the preferred option for those seeking maximum flexibility and control over their website.
Choosing the Right Domain and Hosting
When starting a blog, two critical decisions need to be made right at the beginning: selecting a suitable domain name and finding the right hosting provider. These choices play a vital role in your blog’s success and online presence. In this section, we’ll explore the process of choosing the right domain name and the factors to consider when selecting a hosting provider.
Selecting a Suitable Domain Name
Your domain name for your blog is the unique address that people type into their browsers to access your website. It is not just a technicality; it is the online identity of your new blog. Here are some essential tips to consider when choosing the right domain name:
- Relevance: Ensure that your domain name reflects the theme or niche of your blog page. It should give visitors an idea of what your blog is about before they even visit.
- Simplicity: Aim for a domain name that is easy to spell, pronounce, and remember. Avoid using complex words or unnecessary special characters.
- Keywords: If possible, incorporate relevant keywords into your domain name. Keywords can help with SEO and give visitors a clearer understanding of your blog’s content.
- Avoid Trademark Issues: Steer clear of domain names that infringe on trademarks or copyrighted names. This can lead to legal complications later on.
- Domain Extension: The most common domain extension is “.com,” but depending on your blog’s nature, other extensions like “.net,” “.org,” or country-specific extensions might also be appropriate.
- Avoid Numbers and Hyphens: Numbers and hyphens can lead to confusion. It’s best to stick with letters only.
Finding the Right Hosting Provider
Web hosting is where your blog’s files and data are stored, making it accessible to get your blog online. Some web hosting providers will allow you to get a free domain name with your new account sign-up. Here are crucial factors to consider when choosing a blog hosting provider:
- Performance and Reliability: Opt for a hosting provider with good server performance and uptime. A slow or frequently offline website can discourage visitors and negatively impact your search engine rankings.
- Support and Customer Service: Look for a hosting company that offers reliable customer support. You’ll want quick and helpful assistance in case of any technical issues or questions.
- Scalability: Consider the future growth of your blog. A hosting provider that allows easy scalability will accommodate your increasing traffic and resource needs.
- Security Features: Ensure that the hosting provider offers robust security measures to protect your blog from potential threats, such as malware attacks and data breaches.
- Backup and Restore Options: Regular backups are crucial to safeguarding your content. Check if the hosting provider offers automated backups and easy restoration options.
- Pricing and Plans: Compare hosting plans and pricing to find one that fits your budget and offers the features you require.
- User-Friendly Control Panel: A user-friendly control panel, like cPanel, makes it easier to manage your hosting account and website settings.
By carefully selecting a relevant and memorable domain name and finding a reliable hosting provider that meets your new WordPress blog needs, you are laying a solid foundation for your blog’s success. Remember that these decisions are essential for the long-term growth and visibility of your online presence.
Installing WordPress
Once you have chosen the perfect domain name and secured a reliable hosting provider, the next step in creating your WordPress blog is the installation process. Installing WordPress is a straightforward task, and you have two primary methods to choose from: one-click installation with your WordPress hosting provider or manual installation for more advanced users.
One-Click Installation (With Hosting)
Most reputable hosting providers offer one-click WordPress installation, simplifying the setup process for beginners. Here’s a step-by-step guide to the one-click installation method:
- Access Your Hosting Control Panel: Log in to your hosting account and navigate to your control panel. The most commonly used control panel is cPanel.
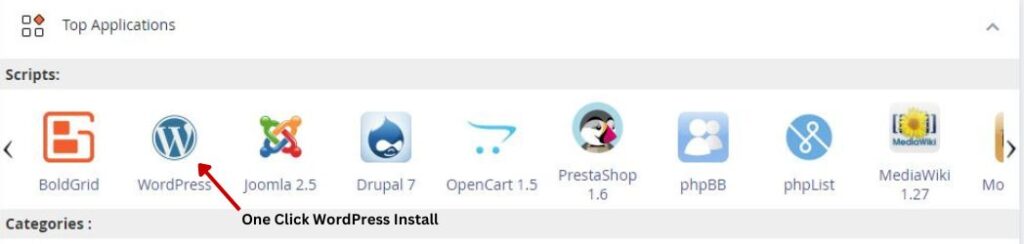
- Locate the “Auto Installers” Section: Look for a section labeled “Top Applications” or “App Installers” in your control panel. Popular hosting providers usually have this feature readily available.
- Select WordPress: Under the “Top Applications” section, find and click on the WordPress icon or name.
- Complete Installation Details: You will be prompted to fill in some installation details, such as your domain name, admin username, and password. Choose an admin username and password that are strong and secure.
- Start Installation: Click on the “Install” or “Start Installation” button to initiate the process.
- Wait for Completion: The installation process may take a few moments. Once it’s finished, you will receive a confirmation message.
- Access Your Dashboard: Visit your domain name (e.g., www.yourblogname.com/wp-admin) and log in using the admin username and password you set during installation.
Manual Installation (Advanced Users)
For those who prefer more control or have specific requirements, manual installation is an option. This method involves downloading the WordPress software from the official website and uploading it to your hosting server. Here’s a brief overview of the steps:
- Download WordPress: Go to the official WordPress website (wordpress.org) and download the latest version of WordPress.
- Create a Database: Log in to your hosting control panel (e.g., cPanel) and create a new MySQL database for WordPress.
- Upload WordPress Files: Use an FTP client to upload the downloaded WordPress files to your web server. Place the files in the root directory or a subfolder, depending on your preference.
- Configure wp-config.php: Rename the “wp-config-sample.php” file to “wp-config.php.” Open the file and enter the database details you created earlier.
- Run the Installation Script: Access your domain in a web browser (e.g., www.yourblogname.com) to run the WordPress installation script. Follow the on-screen instructions to set up your admin account.
- Log in to Your Dashboard: Once the installation is complete, log in to your dashboard using the admin credentials you created.
With WordPress successfully installed, you can now start customizing your blog site, selecting themes, installing plugins, and creating compelling content to engage your audience. The installation process is a crucial milestone in establishing your online presence, and by following these steps, you’ll be well on your way to launching and having your WordPress blog up and running.
Navigating the WordPress Dashboard
Once you have successfully installed WordPress, you can access the heart of your blog: the dashboard. The dashboard serves as the control center, where you can manage and customize every aspect of your website. In this section, we’ll explore the key features of the dashboard and guide you through the WordPress content management system.
Exploring the Admin Panel
After logging in to your dashboard (www.yourblogname.com/wp-admin) using your admin credentials, you’ll be greeted by the admin panel, which is the main interface for managing your website. The admin panel is organized into several sections for easy navigation:
- Dashboard: The default landing page after logging in, the dashboard provides an overview of your site’s activity, including recent posts, comments, and statistics.
- Posts: This section allows you to create, edit, and manage your new blog posts. You can categorize posts, add tags, and schedule them for future publishing.
- Media: Here, you can upload and manage all the media files used on your site, such as images, videos, and audio.
- Pages: Similar to posts, this section lets you create static pages, such as an About page, Contact page, or Privacy Policy page.
- Comments: You can moderate and reply to comments from your visitors in this section.
- Appearance: This is where you can customize the look and feel of your blog. You can choose a WordPress theme, customize menus, and manage widgets.
- Plugins: In the plugins section, you can install, activate, and deactivate plugins to extend the functionality of your WordPress site.
- Users: This area allows you to manage user accounts and set different user roles with varying levels of access.
- Settings: In this section, you can configure general settings, permalink structure, and various other options to tailor WordPress to your preferences.
Understanding WordPress Terminology
As you explore the WordPress dashboard, you might come across some specific terms and phrases. Here are a few common ones:
- Posts vs. Pages: Posts are typically used for regularly updated content, such as blog articles, displayed in reverse chronological order. Pages, on the other hand, are meant for static content, like an About page or a Contact page.
- Categories and Tags: Categories are used to organize your blog posts into different topics or sections, making it easier for visitors to find relevant content. Tags are more specific keywords assigned to individual posts.
- Widgets: Widgets are small modules that can be placed in your website’s sidebars or footer areas. They add extra features or functionalities, such as a search bar or recent posts list.
Customizing the Dashboard for Efficiency
The WordPress dashboard is designed to be user-friendly, but you can further customize it to suit your preferences. You can rearrange and hide certain sections to create a clutter-free workspace, making it easier to access the features you use most frequently.
The WordPress dashboard is your command center for managing and shaping your blog. Familiarizing yourself with its various sections and terminology will empower you to efficiently create and maintain your website, ensuring a smooth and enjoyable blogging experience.
Selecting a WordPress Theme
Selecting the ideal WordPress theme is a pivotal step in crafting a visually appealing and user-friendly blog. Your choice of a WordPress theme dictates the overall layout, design, and functionality of your website, leaving a lasting impression on your visitors. In this section, we’ll guide you through the process of how to choose a WordPress blog theme that perfectly complements your blog, elevating its impact and enhancing user experience.
Exploring Free vs. Premium Themes
There is a vast selection of free WordPress themes and premium (paid) themes. Understanding the differences between these options will help you make an informed decision.
Free Themes: As the name suggests, these themes are available at no cost and can be found directly in the WordPress theme repository. They are a great starting point for beginners or bloggers on a tight budget. Free themes vary in quality, but many of them are well-designed and offer essential features.
Premium Themes: Premium themes are developed by professional designers and developers. They often come with more extensive customization options, additional features, and dedicated customer support. While premium themes require an upfront investment, they can provide a more polished and unique look for your blog.
Factors to Consider When Choosing a Theme
With numerous themes available, it can be overwhelming to select the right one. Here are some essential factors to consider when making your choice:
- Design and Layout: Choose a theme that complements the content and style of your blog. Look for clean, organized layouts that are easy to navigate.
- Responsiveness: Ensure the theme is responsive, meaning it adapts seamlessly to different screen sizes and devices. This is crucial for providing a positive user experience on mobile devices.
- Speed and Performance: A theme’s loading speed directly impacts user satisfaction and SEO rankings. Opt for a lightweight and optimized theme to ensure fast page loading times.
- Browser Compatibility: Test the theme on different web browsers to ensure compatibility and consistent performance across all major browsers.
- Customization Options: Check if the theme offers sufficient customization options, such as color schemes, fonts, and header styles. This allows you to tailor the appearance of your blog to your preferences.
- Support and Updates: If you choose a premium theme, check for the availability of customer support and regular theme updates. Good support ensures assistance if you encounter any issues or need guidance.
- Reviews and Ratings: Read user reviews and ratings for themes you are considering. Feedback from other users can give you insights into the theme’s strengths and weaknesses.
Installing and Activating a Theme
Once you’ve chosen your ideal WordPress theme, it’s time to install and activate it:
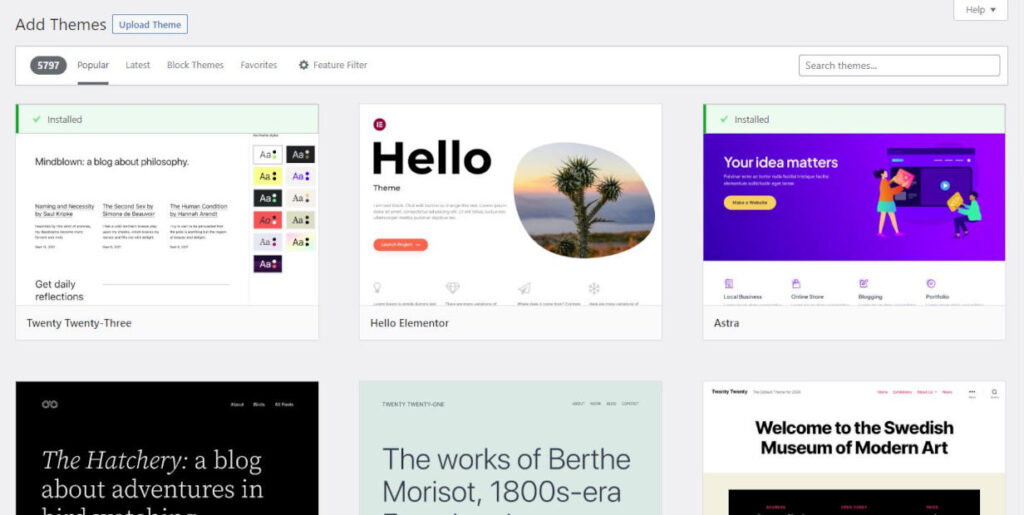
Install Theme: Go to your WordPress dashboard, navigate to “Appearance,” and then click “Themes.” Click “Add New” and either search for the theme by name or upload the theme file if you have it in ZIP format.
Activate Theme: After the theme is installed, click “Activate” to make it your active theme.
Avoid Theme Overload
While it might be tempting to switch themes frequently, it’s best to avoid theme overload. Frequent theme changes can disrupt your website’s design and affect user experience. Stick to one theme and customize it to suit your needs.
Selecting a WordPress theme is an essential step in creating a captivating and functional blog. Consider your blog’s style, audience preferences, and the features you require to make an informed decision. Whether you choose a free or premium theme, finding the right one will elevate the appearance and user experience of your WordPress blog.
Essential Plugins for Your Blog
A WordPress plugin is like power-ups that add extra functionality to your blog without the need for custom coding. They enhance your website’s performance, security, and user experience. In this section, we’ll explore some essential plugins that every blogger should consider installing to optimize their WordPress blog.

1. Yoast SEO
Yoast SEO is a must-have plugin for improving your blog’s search engine optimization (SEO). It assists you in optimizing your content for specific keywords, creating XML sitemaps, and improving the overall readability of your posts. With Yoast SEO, you can ensure that your blog is more visible to search engines and reaches a broader audience.
Spam comments can clutter your blog and diminish its credibility. Akismet Anti-Spam is a powerful plugin that automatically filters out spam comments, saving you time and keeping your comment section clean and trustworthy.
3. UpdraftPlus – Backup/Restore
Regularly backing up your blog is essential to protect your hard work and data. UpdraftPlus simplifies the backup process by allowing you to schedule automatic backups of your entire website, including the database and files. In case of any unfortunate incidents, you can quickly restore your blog with ease.
Speed is crucial for a positive user experience and search engine rankings. W3 Total Cache optimizes your website’s performance by caching and compressing files, reducing page loading times. This plugin also improves your blog’s overall responsiveness and decreases server load.
Maintaining the security of your WordPress blog is paramount. Wordfence Security is a comprehensive security plugin that protects your website from malware, brute-force attacks, and other threats. It also provides real-time monitoring and security alerts to keep your blog safe.

6. Smush
Images are essential for engaging content, but they can also slow down your website if not optimized properly. Smush is an image optimization plugin that automatically compresses and resizes images without sacrificing quality. This ensures faster page loading times while maintaining visually appealing content.
Having a contact form on your blog enables visitors to get in touch with you easily. Contact Form 7 is a popular and user-friendly plugin that allows you to create custom contact forms quickly. You can customize the fields, manage multiple forms, and receive submissions via email.

Encourage readers to share your content by adding social sharing buttons to your posts. There are various social sharing plugins available, allowing you to display buttons for popular social media platforms, increasing your blog’s exposure and reach.
9. Jetpack by WordPress.com
Jetpack is a versatile plugin that offers a range of features, including website statistics, social media integration, and related posts. It also provides automated social sharing, enhancing your blog’s visibility on various platforms.

If your blog is accessible to users from the European Union (EU), you need to comply with GDPR regulations regarding cookies. The GDPR Cookie Consent plugin helps you display a cookie consent banner, allowing visitors to give their consent before cookies are stored.
Remember that while plugins are valuable tools, having too many can impact your blog’s performance. Be selective and choose only the plugins that align with your blog’s goals and functionalities. Installing these essential plugins will enhance your blog’s performance, security, and user experience, setting you on the path to blogging success.
Creating Your First Blog Post
Congratulations on setting up your WordPress blog! Now, it’s time to embark on your blogging journey and create your captivating post. Crafting engaging and informative content is the cornerstone of a successful blog. In this section, we’ll guide you through the process of creating your first post using the WordPress Block Editor (Gutenberg).
Writing Compelling Content
Before diving into the technical aspects, focus on the content itself. Choose a topic for your blog content that resonates with your target audience and aligns with your blog’s niche. Your post should provide value, solve a problem, or entertain readers. Keep these tips in mind while writing:
- Clear and Concise: Write in a clear and straightforward manner. Avoid jargon and complex language that might confuse your readers.
- Engaging Introduction: Start with an attention-grabbing introduction to hook your readers and entice them to keep reading.
- Well-Structured: Organize your content with headings, subheadings, and paragraphs to make it easy to read and digest.
- Include Visuals: Use relevant images or media to complement your text and make your post visually appealing.
- Call-to-Action (CTA): End your post with a clear CTA, such as encouraging readers to leave a comment or explore related posts.
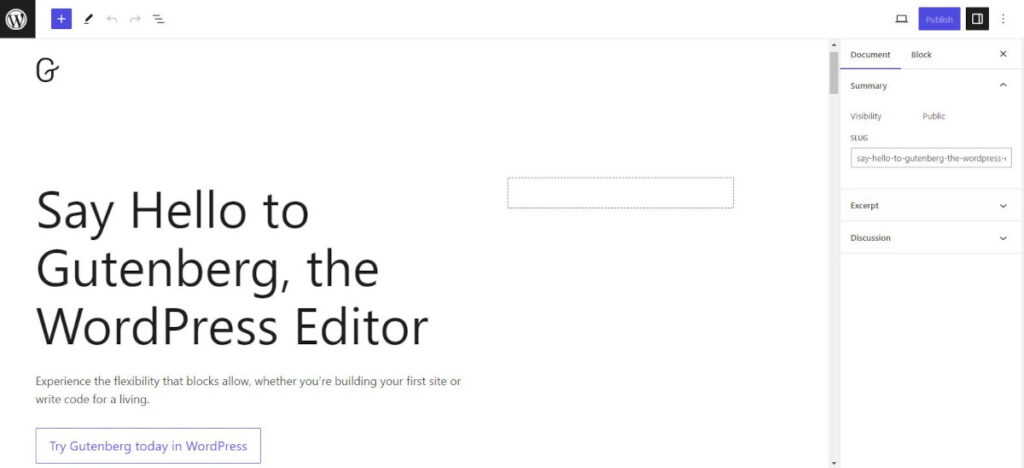
Using the Block Editor (Gutenberg)
WordPress’s Block Editor (Gutenberg) is an intuitive and user-friendly tool for creating content. Here’s a step-by-step guide to creating a post:
- Add a New Post: In your dashboard, go to “Posts” and click “Add New” to start a new post.
- Add a Title: Enter the title of your post in the designated field.
- Insert Blocks: Use the “+” icon or press “Enter” to add different content blocks. Blocks can be paragraphs, headings, images, videos, quotes, and more.
- Write Content: Start writing your post in the content block. Customize text styles, alignments, and font sizes using the options in the block toolbar.
- Add Media: To insert images or videos, click on the “+” icon, select the “Image” or “Video” block, and upload your media from your computer or media library.
- Use Headings: Only use one H1 tag to place the main post or page keyword. Use H2 and H3 headings for subheadings to structure your content and improve readability.
- Formatting: The block editor allows you to format your text by making it bold, italic, or adding hyperlinks.
- Preview and Save: Click the “Preview” button to see how your post will look on the live site. When you’re satisfied, click “Save Draft” to save your progress.
- Categories and Tags: In the right-hand sidebar, you can assign categories and tags to your post. Categories help organize your content, while tags add more specific keywords to your post.
- Publish: Once you’re ready to share your post with the world, click the “Publish” button. You can also schedule the post to be published at a later date.
Creating your first post is an exciting moment in your blogging journey. Focus on providing valuable content, and the Block Editor will help you bring your ideas to life. Remember, practice makes perfect, so keep writing and refining your blogging skills as you embark on this rewarding adventure.
Organizing Your Content with Categories and Tags
As your WordPress blog grows, it’s essential to organize your types of content marketing to make it easy for visitors to find and navigate through your posts. Two essential tools for content organization are categories and tags. In this section, we’ll explore how to use categories and tags to structure your content and enhance user experience.
Understanding Categories and Tags
Categories: Categories are broad topics or sections that group related posts together. They serve as a primary way of organizing your content and help visitors quickly identify the main topics your blog covers. For example, if you have a food blog, your categories might include “Recipes,” “Restaurant Reviews,” and “Kitchen Tips.”
Tags: Tags, on the other hand, are more specific keywords or labels that describe the content of individual posts. Tags provide more detailed information about the topics covered in a post. Continuing with the food blog example, a post about a chocolate cake recipe might have tags like “chocolate,” “cake,” and “dessert.”
Creating an Effective Content Structure
To create an efficient content structure with categories and tags, follow these best practices:
1. Use a Hierarchical Category Structure: If your blog covers a wide range of topics, consider using a hierarchical category structure. This means having main categories and subcategories. For instance, under the “Recipes” category, you might have subcategories like “Desserts,” “Main Courses,” and “Appetizers.”
2. Be Consistent: Create a consistent and logical categorization system that aligns with your blog’s niche. Avoid having too many categories, as it can confuse readers and dilute the focus of your blog.
3. Limit the Number of Tags: While you can have multiple tags for each post, avoid going overboard. Aim for 5-10 relevant tags per post to keep them meaningful and useful.
4. Choose Descriptive Keywords: Use descriptive keywords for both categories and tags. This helps search engines and visitors understand what your content is about.
Improving User Experience
An organized content structure enhances the user experience on your blog in several ways:
1. Easy Navigation: Visitors can quickly find topics of interest by browsing through your categories. They can then explore related posts using tags.
2. Increased Engagement: When users find relevant content with ease, they are more likely to spend more time on your blog, reading multiple posts.
3. Better SEO: Properly organized content signals to search engines that your blog is well-structured and provides valuable information. This can positively impact your search engine rankings.
Search Engine Optimization (SEO)
Search Engine Optimization (SEO) is a crucial aspect of driving organic traffic to your blog and improving its visibility in search engine results. By optimizing your content and website for search engines, you increase the chances of reaching a broader audience. In this section, we’ll explore essential SEO practices specifically tailored for WordPress.
Optimizing Content for Focus Keyword
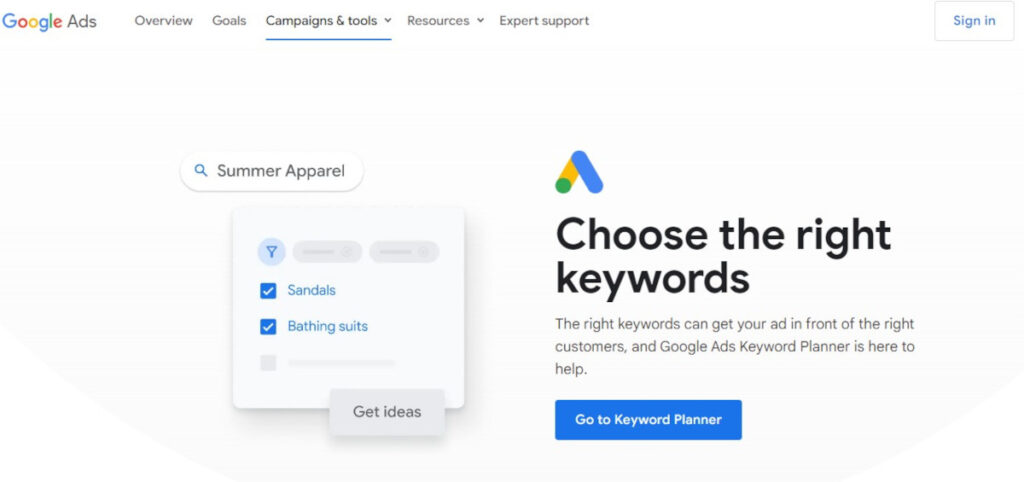
Keyword Research: Start by conducting keyword research to identify relevant and popular keywords related to your post. Tools like Google Keyword Planner, SEMrush, or Ubersuggest can help you discover relevant keywords.
Focus Keyword Placement: Once you’ve chosen your focus keyword, incorporate it strategically in the following elements of your posts:
- Title: Include the focus keyword in the post title to signal its relevance.
- Introduction: Use the keyword in the introductory paragraph to establish the topic’s context.
- Headers: Add the keyword to subheadings (H2, H3, etc.) to improve the content structure and readability.
- Throughout the Content: Naturally include the keyword in the body of your post, but avoid keyword stuffing.
Meta Description: Write a compelling meta description for your posts, which is a concise summary that appears in search engine results. Include the focus keyword here to entice users to click on your link.
Utilizing Yoast SEO Plugin
Yoast SEO is a popular and user-friendly plugin that helps streamline your SEO efforts on WordPress. Here’s how to leverage the Yoast SEO plugin for optimal results:
Focus Keyword Analysis: Yoast SEO allows you to set a focus keyword for each post. It analyzes your content and provides suggestions to improve your keyword usage.
Readability Analysis: This feature evaluates the readability of your content, suggesting improvements to enhance user experience.
Meta Titles and Descriptions: Yoast SEO enables you to customize the meta title and description, giving you control over how your content appears in search results.
Building Backlinks and Internal Linking
Backlinks: Backlinks are links from other websites to your blog. Earning quality backlinks from reputable sources signals to search engines that your content is valuable and trustworthy. Focus on creating high-quality content on your blog that other websites would want to link to naturally.
Internal Linking: Internal linking involves linking to other relevant pages or posts within your blog. This practice helps search engines understand the structure of your content and improves user navigation. Additionally, internal links distribute page authority across your site, benefiting SEO.
Regular Content Updates and Freshness
Regularly updating your blog with fresh and relevant content signals to search engines that your website is active and valuable. Aim to publish new posts consistently and revisit and update existing content to keep it up-to-date.
Mobile Responsiveness and Page Speed
Mobile responsiveness and page speed are crucial ranking factors for search engines. Ensure that your theme is mobile-friendly and optimize your website’s loading speed by compressing images, enabling browser caching, and using a reliable hosting provider.
By following these SEO practices and utilizing the Yoast SEO plugin, you can improve your WordPress blog’s search engine rankings, attract more organic traffic, and expand your online presence. Remember that SEO is an ongoing process, and staying informed about the latest SEO trends and updates will help you stay ahead in the competitive online landscape.
Promoting Your WordPress Blog
Once you’ve created compelling content and optimized your WordPress blog for search engines, the next step is to promote it effectively to reach a wider audience. Promoting your blog helps increase traffic, build a loyal readership, and boost your online presence. In this section, we’ll explore various strategies to promote your WordPress blog and attract more visitors.
Utilize Social Media Platforms
Social media is a powerful tool for promoting your blog and engaging with your audience. Share your blog posts on popular social media platforms like Facebook, Twitter, Instagram, LinkedIn, and Pinterest. Create eye-catching graphics and captions to entice users to click on your links. Engage with your followers, respond to comments, and join relevant communities or groups to expand your reach.
Email Marketing
Start building an email list early on by encouraging visitors to subscribe to your blog. Use email marketing platforms like Mailchimp or ConvertKit to send personalized newsletters, updates, and exclusive content to your subscribers. Email marketing helps maintain a direct connection with your audience and drives repeat traffic to your blog.
Collaborate with Other Bloggers
Networking and collaborating with other bloggers in your niche can be beneficial for cross-promotion. Guest post on other blogs to introduce yourself to new audiences, and invite guest bloggers to contribute to your blog. These collaborations can lead to new followers and increased exposure for your blog.
Engage in Blog Commenting
Participate in discussions on other blogs by leaving thoughtful comments. Engaging in blog commenting can lead to meaningful connections with fellow bloggers and attract new readers who might click on your link to learn more about you and your blog.
Share on Online Communities and Forums
Join online communities and forums related to your blog’s niche. Share your blog posts in a helpful and non-spammy manner. Always provide value and context when posting links to your blog. By contributing genuinely to the community, you can gain trust and attract interested readers.
Utilize Visual Content
Visual content, such as infographics, videos, and eye-catching images, can significantly enhance your blog’s promotion efforts. Visuals are more shareable and engaging on social media platforms, increasing the likelihood of your content going viral.
Participate in Podcasts and Webinars
Explore opportunities to be a guest on relevant podcasts or webinars. Sharing your expertise and insights in these formats can introduce your blog to a broader audience and position you as an authority in your niche.
Monitor Analytics and Refine Strategies
Regularly monitor your website analytics to understand which marketing strategies are working best for you. Focus on the platforms and channels that drive the most traffic and engagement. Continuously refine your promotion strategies based on the data to achieve better results over time.
By actively promoting your WordPress blog and diversifying your promotional efforts, you can attract a larger audience, build a loyal readership, and establish your blog as a reputable source of valuable content. Be consistent, patient, and open to trying new promotional tactics to achieve long-term success in growing your blog’s reach and influence.
Monitoring and Analyzing Your Blog’s Performance
After putting effort into creating and promoting your WordPress blog, it’s essential to track its performance to understand how well it’s doing and identify areas for improvement. Monitoring and analyzing your blog’s performance provide valuable insights that can help you optimize content, attract more visitors, and achieve your blogging goals. In this section, we’ll explore the key aspects of monitoring and analyzing your blog’s performance by implementing Google Analytics in your WordPress blog.
Utilize Website Analytics
Google Analytics: Google Analytics is a powerful and free tool that provides in-depth data about your website’s traffic, user behavior, and more. Install the Google Analytics tracking code on your WordPress blog to start collecting data.
Key Metrics to Monitor:
- Total Sessions: The number of visits to your blog over a specific period.
- Pageviews: The total number of pages viewed by visitors.
- Bounce Rate: The percentage of visitors who leave your site after viewing only one page.
- Average Session Duration: The average time visitors spend on your site during a session.
- Traffic Sources: Identify where your traffic is coming from, such as organic search, social media, referrals, etc.
Track Conversion Goals
Set up conversion goals in Google Analytics to measure specific actions you want your visitors to take, such as signing up for your newsletter, filling out a contact form, or making a purchase. Tracking conversion goals helps you assess the effectiveness of your calls to action (CTA’s) and optimize your website for higher conversions.
Use Heatmaps and User Recording Tools
Heatmaps and user recording tools provide visual representations of user behavior on your blog. They show where visitors click, scroll, and spend the most time on your pages. Heatmaps can reveal which parts of your blog are engaging and which areas may need improvement.
Pay Attention to Engagement Metrics
Engagement metrics help gauge how well your content resonates with your audience. Monitor metrics like social media shares, comments, and time spent on your blog posts. High engagement indicates that your content is valuable and engaging to visitors.
Analyze Search Engine Performance
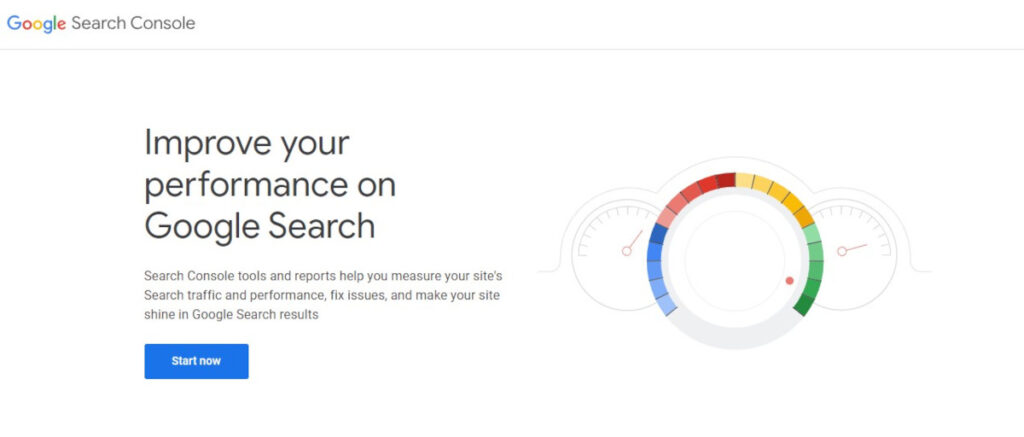
Monitor your blog’s search engine performance using tools like Google Search Console. It provides data on your website’s search impressions, clicks, and average position in search results. Identify which keywords are driving traffic to your blog and focus on optimizing your content for relevant keywords.
Set Regular Performance Reviews
Schedule regular performance reviews to analyze your blog’s progress over time. Review trends, changes in traffic, and engagement metrics. Use the insights to refine your content strategy and promotional efforts.
Act on Insights and Test New Strategies
Based on your performance analysis, take actionable steps to improve your blog’s performance. For instance, if certain blog posts are driving more traffic, create similar content. If a specific promotional channel is not yielding results, explore other avenues.
Stay Informed and Adapt
Stay updated on the latest trends in blogging and SEO. Algorithms and user behavior change over time, so it’s crucial to adapt your strategies accordingly. Continuously refine your content, SEO practices, and promotional efforts to stay ahead in the competitive blogging landscape.
By consistently monitoring and analyzing your blog’s performance, you can identify what’s working well and what needs improvement. Data-driven insights empower you to make informed decisions to optimize your blog, attract more visitors, and achieve your blogging goals successfully. Remember that the process of improving your blog’s performance is iterative, and learning from the data will help you grow your blog over time.
Maintaining and Updating Your WordPress Blog
Maintaining and updating your WordPress blog is essential to ensure its longevity, security, and optimal performance. Regular maintenance tasks and updates help keep your blog running smoothly and protect it from potential security threats. In this section, we’ll explore the key aspects of maintaining and updating your WordPress blog.
Regular Backups
Perform regular backups of your WordPress blog to safeguard your valuable content and data. There are several plugins available, such as UpdraftPlus, that can automate the backup process and store your backups in remote locations, like cloud storage services.
Keep WordPress Core Updated
WordPress releases regular updates to improve functionality, security, and performance. Always keep your WordPress core updated to the latest version. Enable automatic updates whenever possible to ensure you’re running the most secure and efficient version of WordPress.
Update Themes and Plugins
Regularly update your WordPress themes and plugins to take advantage of new features, bug fixes, and security patches. Outdated themes and plugins can be vulnerable to hacking attempts. Be cautious and choose reputable themes and plugins from reliable sources.
Security Measures
Implement security measures to protect your blog from potential threats. Use strong and unique passwords for your admin account and database. Consider using a security plugin like Wordfence or Sucuri to monitor and block suspicious activities.
Check for Broken Links
Regularly scan your blog for broken links using plugins like Broken Link Checker. Broken links can harm your blog’s user experience and negatively impact SEO. Fix or remove broken links to maintain a seamless browsing experience for your visitors.
Optimize Database
Over time, your WordPress database can accumulate unnecessary data, leading to increased load times. Use plugins like WP-Optimize to clean and optimize your database, improving website performance.
Monitor Site Speed
Website speed is crucial for user experience and SEO. Use tools like Google PageSpeed Insights or GTmetrix to monitor your site’s loading speed regularly. Optimize images, leverage browser caching, and choose a reliable hosting provider to improve site speed.
Review and Update Content
Regularly review your blog posts and update them as needed. Add new information, replace outdated content, and fix any formatting issues. Updated and relevant content is more likely to attract and retain readers.
Comment Moderation
Keep your comment section clean and engaging by moderating comments regularly. Remove spam comments and respond to genuine comments to foster a sense of community on your blog.
Test Your Blog’s Responsiveness
Ensure that your blog is mobile-friendly and responsive across different devices and screen sizes. Test your blog on various smartphones, tablets, and browsers to ensure a consistent user experience.
Conclusion
Maintaining and updating your WordPress blog is an ongoing commitment that plays a crucial role in its success. By following the best practices for maintenance and staying proactive with updates, you can ensure your blog remains secure, efficient, and user-friendly.
Regular backups are the safety net for your hard work, protecting your valuable content and data from unforeseen incidents. Keeping your WordPress core, themes, and plugins up to date is essential to access the latest features, bug fixes, and security enhancements.
Security measures are paramount to safeguard your blog from potential threats. Implementing strong passwords, using security plugins, and staying vigilant against suspicious activities will fortify your blog’s defenses.
Optimizing your blog’s performance with database cleaning, site speed optimization, and mobile responsiveness will elevate user experience and boost your search engine rankings.
Don’t neglect the content itself; periodically review and update your blog posts to keep them relevant and valuable to your readers. Engaging with your audience through comments and fostering a sense of community on your blog will strengthen your connections with readers.
Remember, maintaining and updating your WordPress blog is an ongoing process, but the benefits far outweigh the effort. Regularly invest time in these tasks to ensure your blog continues to flourish and achieve its goals.
As you navigate the exciting world of blogging, make a habit of monitoring and analyzing your blog’s performance using tools like Google Analytics. Data-driven insights will provide valuable feedback on your progress and help you fine-tune your strategies for even greater success.
Lastly, enjoy the journey of blogging! Embrace creativity, learn from your experiences, and stay curious about new trends and technologies. With dedication, consistency, and a passion for sharing your knowledge and insights, your WordPress blog will thrive, and your voice will resonate with audiences far and wide.
Here’s to a thriving and successful WordPress blog! Happy blogging!